My first installment of the Sundara Yarn sock club arrived today! The yarn is soooooo gorgeous!!!!
The sock club is called the Petals Collection because the yarn colors are inspired by flowers that are in bloom during the month you receive your package. This time it's the Calla Lily.
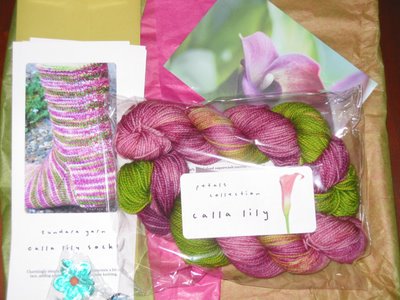
The package was charmingly wrapped: both the tissue paper and the envelope that contained the pattern match the colors of the yarn (which I'm totally loving). Note the cute little blue lollipop that was included! The presentation definitely gets an A+++!
The pattern looks lovely as well; it's hard to see on the pic, but there's a lace motif going down the back of the leg. It includes instructions for dpns, 2 circs and magic loop, and it has already been test knitted. Wow.
Also, I'm very allergic to cats, and Sundara keeps the yarns destined for customers with cat allergies in a special area where cats aren't allowed. I don't know anyone else who does this and I'm so grateful!
To be frank, fiber is important and everything, but color is the #1 consideration for me when selecting yarn; it could be made from the magical mane of a friggin' unicorn, but it means nothing to me if it has been dyed the color of yuck with shades and stripes of blech and ewww interspersed. (You've seen those colors; you know what I'm talking about.) This is why I get soooo excited when I see gorgeous and well balanced color combos. I just get that magical look in my eye and my bf knows he's going to have to wrestle my wallet from me before I buy more yarn. My excuse that yarn makes good insulation doesn't work anymore... Anyone have any good ones?
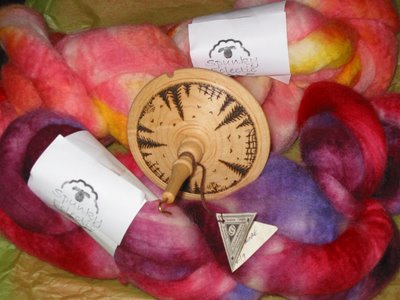
Meanwhile...as if I needed to take this knitting thing even further...
Yes, I'm going to try to learn spinning! Armed with some internet sources, part of a book, and advice from my Yahoo groups, I'm going to go for it! The spindle was made by Tom Forrester and I bought it at The Wheel Thing (the same place I got my Noste, btw) The rovings are Blue Faced Leicester dyed by Spunky Eclectic.
Thursday, June 29, 2006
Tuesday, June 27, 2006
Progressing and Ranting
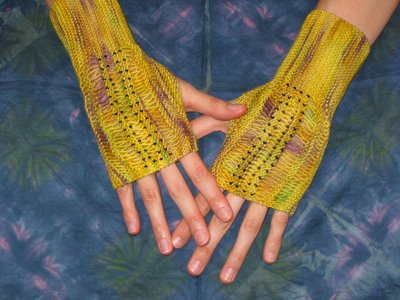
I have too many UFOs. Some are buried in the bottom of closets in unmarked bags, and I just deny that they're there...so before I get into my upcoming Maple Leaf and Tempting II KALs, I managed to finish these fingerless mitts from One Skein...
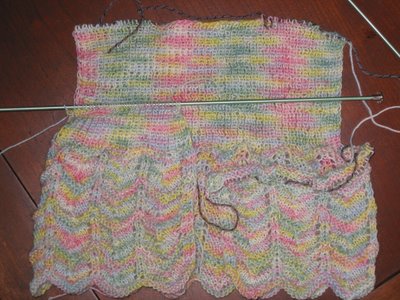
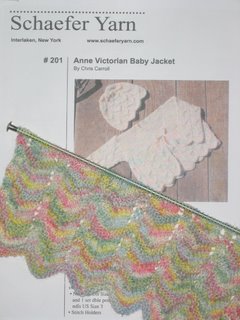
...and I made some more progress on the Victorian Baby Jacket.
The Jacket was going smoothly until I hit a few frogs. When I was working on the back of the jacket, the pattern told me to decrease 11 stitches evenly on the first ribbing row. So I did, and so it ended up looking like crap because it messed with the Lace Pattern. I ripped the ribbiting ribbing out and spaced my decreases to be above the "bottom" points of the zigzag pattern. No more weird puckering in random places for me, thank you. I wasn't going to trust that the blocking fairy would fix this later.
Happy with the result, I started on the right front, and had the most fiendish time with the decreases along the neck shaping. The pattern called for decreasing at the neck edge every row. They said to do this by K2 tog on the RS (which slants the wrong way). What about the WS? What about when I get to working on the Left Front of the Jacket? I don't think so.
I finally figured out the decreases that looked the same on both the RS and WS, and also slanted the way I wanted: S1, K1, PSSO for the RS, and P1, S1, PSSO on the WS. Also, on both sides I slipped the S's as if to knit to make the stitches lie correctly. I'll have to decrease differently to adjust for the Left Side.
I know, I'm lazy and easily annoyed. I shouldn't expect to have patterns that tell me everything so I don't have to work my brain. I should enjoy these headaches (I say, trying to suppress a snarl) because they'll help prepare me for future projects, right? So I'll turn into a hair-pulling frothing growling maniac once in a while, and I'll entertain myself with the thought that some patterns writers of the world are either 1) trying to mess with me and waste my time or 2) assume I know better than to blindly follow all suggestions. At any rate, it just means I'll appreciate even more the patterns writers of the world who are kind enough to specify what decreases/increases you need to achieve the right look, so you don't have to bother desperately rooting through your knitting reference books after midnight, which, as I've now discovered, turns me into the monstrous Legendary Knitting Werewolf.
AROOOOOOOOooooooooooOOOOOO!
Saturday, June 24, 2006
Souvenirs
I'm back from my vacation to sunny (except for one day of continual tropical downpour) Puerto Rico, and this is my haul (sunburn not pictured):
The sock coinpurse and finger puppet (which I really hope to be able to duplicate someday!) were from the gift shop of the hotel I stayed at. 99.9% of the stuff they were selling was made elsewhere, so I'm pretty sure it applies to my purchases as well...However, the sand-bleached shells and brain coral came directly from the beaches.
When I was a kid, I went on a trip to Monterey, CA, and brought home some shells like the one pictured bottom right. I lay them out on our backyard and smiled with childish glee at the impressive collection of shells I had accumulated. I sat down and dutifully started cleaning the shells to rid them of some of that "oceanic" smell, when suddenly, something jumped out of one of the shells and grabbed my thumb. Much screaming insued, and to this day, my sea creature phobia causes me to make doubly sure that those things are empty before I take them home. Maybe that's why I collect yarn now; it doesn't bite.
I have two KALs starting in a few days and am getting my supplies together. More knitting related things to be blogged about in the near future.
Friday, June 16, 2006
Yeay! It's here!
I just got my Lexie Barnes Lady B bag today!!! The pattern is called Neptune and I bought it at kpixie. Happy-happy-happy! The extra "happy"s are there because I had to go through a bit of an extra hassle with this bag - my fault, though. I had initially ordered this bag in the print called "Makiko". It is a red bag with cherry blossoms in the background, and in the foreground are large circular bells with pictures inside of them. When it arrived, something looked funny to me with the pattern...the images inside the bells were all upside down...! At this point, I must say that if you're not familiar with traditional Japanese imagery, you would probably not notice. However, I am half Japanese, and I did...and it bugged me. The images included: gourds, stylized bonsai and hollycock leaves; these are things you would see in old paintings. They are also used in some family crests; examples are most commonly found on laquerware and armor.
I wrote to both kpixie and Lexie Barnes. Kudos to both companies for immediately offering to exchange the bag. I was very happy with the customer service I received! Lexie Barnes even wrote back to me, explaining that they chose to show the Makiko pattern the way they did so that the cherry blossoms in the background would appear upright. (however...cascading cherry blossoms are another popular traditional Japanese image...) I totally understand it was a design choice, and I respect that, but it will always look upside down to me (and my mom and all my friends of Japanese ancestry).
Anyway, I exchanged the bag with kpixie, and I got my Neptune bag today - all this happened in less than a week! Talk about fast! I love kpixie (they even credited me for the shipping charges) and I must say, I really love this knitting bag! Tons of sleeves for accessories and 2 for straight needles. Waterproof, dirt proof exterior, nylon interior, and non-slip handles. Really cute and holds a ton of yarn. A sweater would fit in there no problem!
Lesson learned: look closer at what I want to buy...
Wednesday, June 14, 2006
Travel Diversions
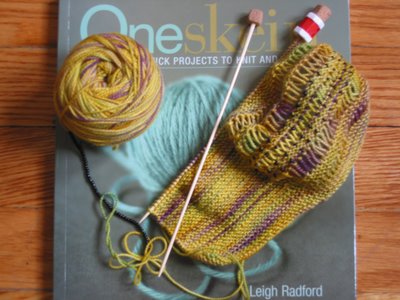
I went on a little trip to Boston for a couple of days, and took along the Fingerless Garter Mitts from One Skein for the train ride.
The patterns in this book all call for the use of one skein of yarn (various weights of yarns for different projects). It's a really appealing concept for a person like me who has a silly habit of picking up lone skeins of yarn just because I like collecting them.
I had some major frogging issues early on: the instructions say to "slide bead into place close to needle", so I just knit the beads through the stitches like for Grumperina's Odessa. Nope, turns out, I was just supposed to literally slide the bead up to the needle and NOT knit it through the stitch (grumble-grumble...wish they could've included some illustration). I do like the book though, but apparently there are mistakes. The designer Leigh Radford has listed errata here, but according to some things I've seen on message boards, there may be more mistakes lurking about.
Oh, and I MADE THOSE NEEDLES! The night before I left, I realized I didn't have any 2.25mm needles, so I sanded down a couple of bamboo skewers until they passed through the 2.25mm hole on my Susan Bates needle size/ gauge checker. Then I cut a couple of cubes out of a wine cork, and sanded those down too. In case you're curious, bamboo skewers start out at a size 3.
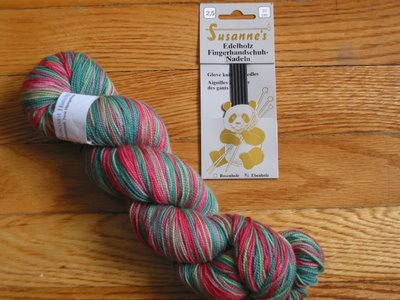
While in Boston, I went to A Good Yarn, a LYS recommended by the Subway Knitter on her blog. It's a great little shop, and I came away with a set of 10cm long ebony dpns. I have never seen such short needles! How perfect for knitting the fingers on gloves! The yarn is from Seacoast Handpainted Yarns, located in Brentwood, New Hampshire. This colorway is called "Strawberry Patch", and the colors are deeper than what's on screen. I could only find their yarns on their ebay store.
Finally, an embarassing story; the other night, a bag of yarn fell off the top of my stash tower, and when it hit the floor, it woke up both me and my bf. I really have too much yarn. I admit it, but will keep buying it.
Saturday, June 10, 2006
Better pic
...mental note: nicer weather and a tripod make for better pictures...
I've started the back of the Victorian Baby Jacket, and have come to realize the hypnotic similarities between say, a swinging pocket watch and K1 P1 ribbing. Also, I'm counting the rows (bo-ring!) using one of those red Clover Kacha-Kachas. Incidentally, "Kacha-Kacha" just means "Click-Click" in Japanese. The yarn is pooling a tiny bit in the ribbing sections. I wonder what will happen when I get to the front R and L sides???
Friday, June 09, 2006
Crunch time!
It seems baby season is upon us! I have a couple of friends who will be having babies by the end of summer, so I figured I'd better get knitting already. Nothing worse than a baby gift that's too small for the recipent to wear!
The weather has been perpetually gray and therefore unfriendly to picture taking...sorry it looks so dark.
I'm making this baby jacket/hat kit from a Shaefer Yarn Pattern which calls for 1 skein of their "Anne" yarn. It's 25% mohair, 15% nylon and 60% Superwash Merino. It looks delicate but it's machine washable! Score! Also, there are a whopping 560 yards of this stuff to work with. I would never again have to fear running out of yarn making a pair of socks. I love this soft and durable yarn!
Wednesday, June 07, 2006
Cover Girl!
I would like to present the new face of the Yarn over Manhattan blog... (drumroll)
Please welcome the lovely Gina Stangl!
I've been looking for a hat/scarf photo model for a while, and quite frankly, most of the mannequin heads I've seen have been _way_ to creepy for my taste! This girl is the perfect combo of practicality and glamour for me!
Having barely a moment to take a breath after being unwrapped from a coccoon of bubble wrap and a frenzy of styrofoam peanuts (don't worry, I recycle), Gina is immediately thrown into the limelight with her first photo shoot!
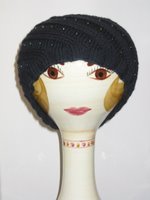
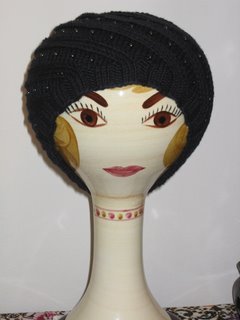
Here is Gina modelling Odessa (pattern found at the amazingly talented Grumperina's website...Grumperina is my hero! She is seriously inspiring!)
I love knitting hats, so I'm sure Gina will be sporting the next season's coifs soon!
FO River Rapids
Yeay! The STR Fairgrounds yarn has become the River Rapids Socks! Pattern to be found at Sockbug
Modifications: I wear a 9 1/2 size shoe, but my feet are pretty narrow. Add that to the fact that I knit on the loose side, and I found myself having to shrink from 64 to 48 stitches! I know, it may sound extreme, but these socks fit me perfectly so I had to do what I had to do! I used Addi turbos #2, and went for the cuff down Magic Loop method. I think I like cuff down better...when going toe-up, I can't get the bind-off perfect...
Oh, also, to make the ribbing match with the rest of the pattern, you should start the ribbing with P1, K2, P2, K2 (etc.) ending with P1. Starting with a Purl stitch can cause ladders, so make sure to pull tight at the joins!
Thursday, June 01, 2006
Splitting Up
Okay, so here's how I split my STR yarn so I could have 2 balls of yarn to do Magic Loop:
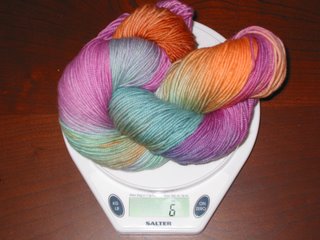
First, I weighed the yarn. Although it said 5.5 oz on the label, it's weighing in at 6 oz, so I want to split this into two 3 oz balls of yarn.
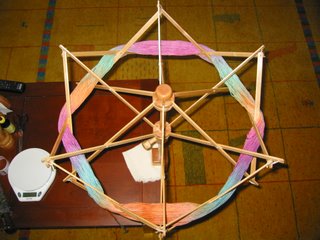
Here is the STR yarn happily coiled around the swift. That's felt I'm using with the clamp so it doesn't damage the table.
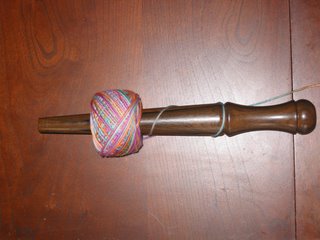
I wind my yarn using a Nostepinne or Nostepinde. (I've seen it spelled both ways). I bought mine here, but many people have had success using medicine bottles, toilet paper rolls, broken off legs of chairs, etc. You start by winding the yarn in a horizontal spiral, and then gradually tilt the Noste so the yarn is wrapping diagonally. You then start turning your Noste away from you; counter clock wise. With practice, you can shape the ball however you like; I like mine to have a flat base so I don't have to contend with balls rolling under the couch to the nether regions of Dust Bunny Land from which few things return unscathed.
In this case, I kept winding the ball until it reached 3 oz (once in a while, I would take the ball off the Noste and weigh it to see where I was.) Once it got to 3 oz, I looked for the same area of color where the ball began and cut the yarn there. This way, both balls of yarn start with the same color pattern repeats, which is good if you're using self striping yarn and want your socks to match. If you're nervous about cutting the yarn, leave a long tail off the end of the first ball and then start winding the second. When you're done, weigh both balls to make sure they're the same, then snip!
Subscribe to:
Posts (Atom)